Followers

Showing posts with label Dark. Show all posts

Monday, 31 July 2017

The Return Of Airless Chamber And The Amazing Aquaria

                                          Hi all
The Airless Chamber Challenge blog is back starting this month and i would love to see all your dark makes linked up, I made this card using the new Aquaria image and isn't she beautiful. You can find her on Zibbit https://www.zibbet.com/rick1949/aquaria-dark-mermaid-digi-stamp. Here is the link to the challenge http://airlesschambers.blogspot.co.uk/


Saturday, 17 June 2017

IKE's Art Giger Tribute ATCs


Hi all

As you are probably aware i am a huge Aliens fan, so i wanted to create something that was a bit reminiscent af H. G Giger the artists behind the original Aliens movies. I used the Giger Tribute stamp from IKE's Art and took it from there.

I am playing along with 


I painted a ATC blank with black acrylic paint and used the Short Circuit stencil with modeling paste to create the background.

I then cut up a plastic skeleton and painted it with white gesso and then with black paint. I dry brushed silver metallic paint over the embossed areas and bones.


I used a mould to create the face and facehugger. I used modeling paste in a skeleton hand mold let it set over 24 hrs and then i cut the middle finger off and glued it to the back to make the tail before painting it all in flesh and gluing it to the face.


I used the spine part of the Giger Tribute stamp.


The next ATC was created by painting Texture Sand Paste over the ATC first and then painting it black once dry. I  then added a stencil to a section of the background and painted over the top with silver paint which gave it a weird gooey look.


The creature was created out of air hardening clay and i panted the face with a paint mix of bale blue and pale grey. I just experimented with the amount until i got this deathly pale look. I used clay to create the spine like hair and added a skeletal hand over the face to compete the look. I painted the whole thing black and then rubbed Silver Spark Metallic lustre over the top.


For this ATC i used twxture sand paste on the base and then drywall tape, Painted it all in black and the applied the  Snakes Web stencil over the top and painted it black. I then added the short circuit stencil to one section of the ATC and dry brushed the whole base with Silver Spark Metallic Lustre.


I coloured in the Giger Tribute stamp and cut it up and placed the main body in  the corner of the ATC. The Arms i made using paper clay and i just rolled out some long thin sausages. The hand are the skeleton hands which i attached to the appendages and painted black. The Face was made with a mold and painted with a blue and grey paint mixture.


Thursday, 8 June 2017

Spooky ATB using Querks stamp set


Hi all


I have a spooky ATB to share with you today using the Querks set by Rick St Dennis.


I used a set of ATB's or Artist Trading Blocks and decorated them before gluing them together. I coloured the Querks in with Brusho powders.


I created the skull using a mould and plaster of paris. I then painted it with Metallic Lustre.


I used skull beads to make the feet.


The Chipboard shapes are by Tando Creative.

Thank you for visiting


Tuesday, 4 April 2017

Even Death Has A Bright Side

Hello crafty  friends

I was lucky enough to win a few stencils from Imagination Crafts and i received the Sugar Skull stencil with a few other stencils. 
I am playing along with the Dream in Darkness April Challenge 


Products
DecoArt Modeling paste
DecoArt Fluid Acrylic Carbon

1) Place stencil onto a piece of card
2) Apply modeling paste over stencil and leave to dry
3) Paint whole skull in black paint
4) Apply Metallic Lustre over the embossed areas
5) Cut out the skull and glue twine to the back. I used a scrap piece that had been spritzed with ink.

Thank you for visiting


Sunday, 26 March 2017

How to create weathered coffins


Hello Crafty Friends
While i am getting some new craft projects ready i thought i would share a few of my older ones. These are a pair of weathered coffins i created using DecoArt products. There is a short tutorial below if you want to learn  how to recreate that ancient exhumed wood look.


I used the large rosette die by Tim Holtz and added a little mdf spider on top.


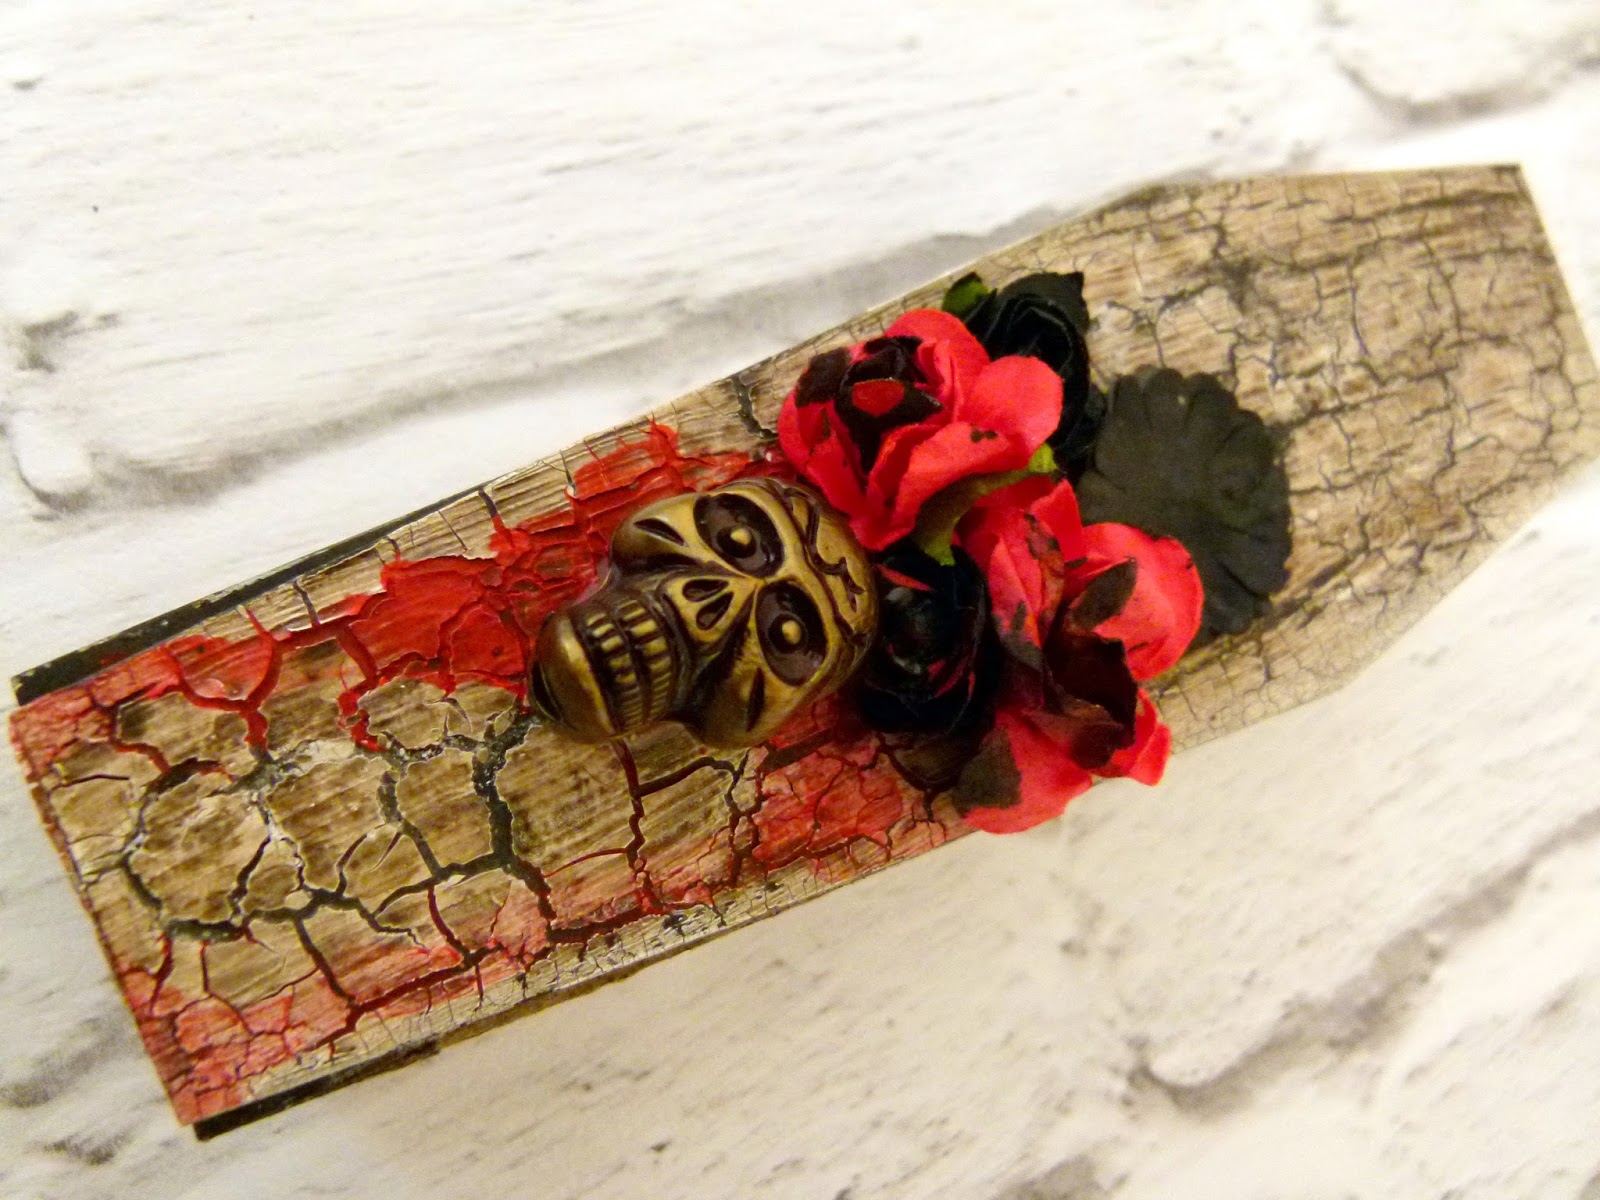
I used a skull bead and added flowers


This one was stained with red DecoArt Media Mister and spritzed with water which i let drip down the lid. Looks like blood doesn't it.


To create this weathered wood look, I first coated the coffins in Black Gesso and then once dried i added Weathered Wood Crackle Medium. 


Next add a thick layer of White Crackle paste and leave to dry. Once dry you get a deep crackle that will flake off if it isn't sealed.


To get the faded mahogany look, i used DecoArt Antiquing cream and painted on the English Red Oxide around the edges. I then used a wet brush and spritzed water onto the cream to turn it into a wash and just painted it over the whole coffin. I repeated this step with Raw Umber to get a dirty brown color.


I lined the coffins with red material so it looks like a Vampire Coffin.

Thank you for visiting